
Getting Started in Maya, Part 1: The Viewport
- Animation Archive
- Mar 24, 2019
- 3 min read

Updated: Mar 26, 2019
If you've always wanted to get into 3D work or you are completely confused or overwhelmed, then this series will help get you started in Maya with the very basics. By the end of the series, you'll be able to navigate within the program and manipulate objects easily.
This is the first part of a five part series for how to get started in Maya, if you've never touched the program before. If you're not already familiar with it, Maya is a 3D software that allows you to do anything from modeling and texturing, rigging and animation, and lighting and rendering. It is a standard in the industry, so it's a great program to get familiar with.
*For the purposes of this post, I'll be using screenshots from Maya 2016, so your interface may look a little different.
Navigating the Viewport
The viewport is the area in which you interact with your 3D objects. In short, it's a virtual 3D space.
By default, your viewport will be focused on a grid. The grid is not selectable and is just meant as a reference point for your 3D objects. At the center of the grid is what's called the origin, or point 0, 0, 0 in x, y, and z coordinates. You can see which direction is the x, y, or z by checking the indicator in the bottom left corner of the viewport. x and z are the axes in the length and width directions and y is the up and down axis. Maya also keeps consistent colors to indicate these axes.
x = red
y = green
z = blue

Cameras

To fully understand the viewport, we first have to talk about cameras. Whenever you look at the viewport, you're looking through a virtual camera. You can tell which camera you're looking through by checking the text at the bottom of the viewport. By default, your Maya scene will be set up to look through the perspective camera.
There are two different types of cameras:
perspective - displays objects in perspective (aka. objects that are farther away appear smaller)
orthographic - flattens objects so that they all appear at the same scale
There are also a few different preset orthographic cameras that you can use in Maya. These include front, side, and top.
To access these other cameras, the easiest way is to tap the space key when your cursor is hovered over your viewport. This will bring up a view with your perspective camera, side camera, front camera, and top camera in clockwise order. To blow one of these view up, just hover your cursor over it and tap the space bar again. You can continue using this space bar method to navigate back and forth between these views.
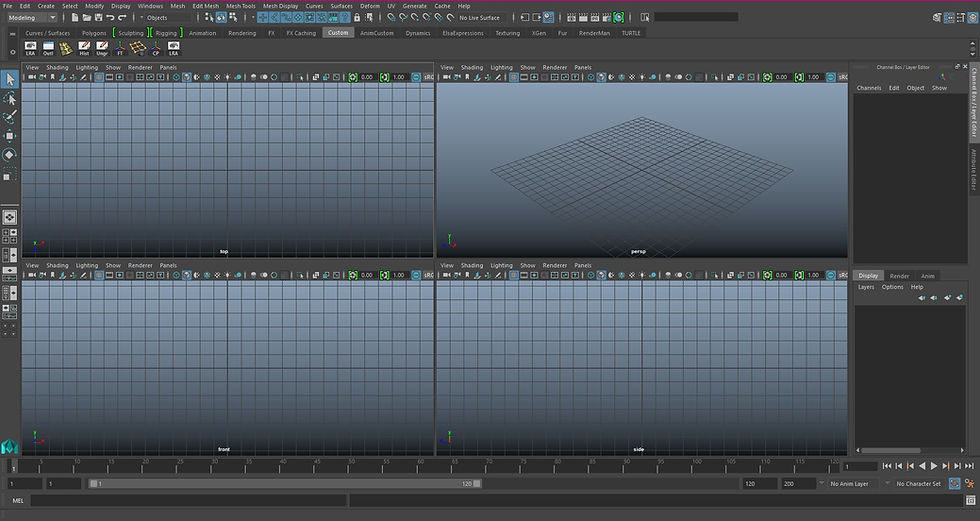
Another way to access your different cameras is to use the panels tab at the top of the viewport. You can switch to any perspective or orthographic camera by hovering over those options

Navigation
There are three different ways to move within the viewport: tumble, pan, and zoom. Most likely you've heard of panning and zooming from normal cameras, and if so, these work in the same way. Tumbling may be less familiar, but all this means is that you are rotating around the pivot point of your camera in the 3D space. The key combinations to do each of these are listed below.
Tumble: alt + left mouse
Pan: alt + middle mouse drag
Zoom: alt + right mouse drag (or use scroll wheel)
The two different options for zooming are up to personal preference. I find that using alt + right mouse drag gives more control when zooming in very close or zooming over small distances, but the scroll wheel works very effectively for most purposes too. You'll also notice that the tumble option only works when you're using a perspective, rather than orthographic camera.
Another way to navigate the viewport is by using the "f" key. This allows you to "frame" in on whatever object(s) you have selected. By clicking this key, Maya will zoom in to the object, centering it on your screen.


Comments